Understand the risks associated with hiring an in-house virtual events manager and the benefits that…
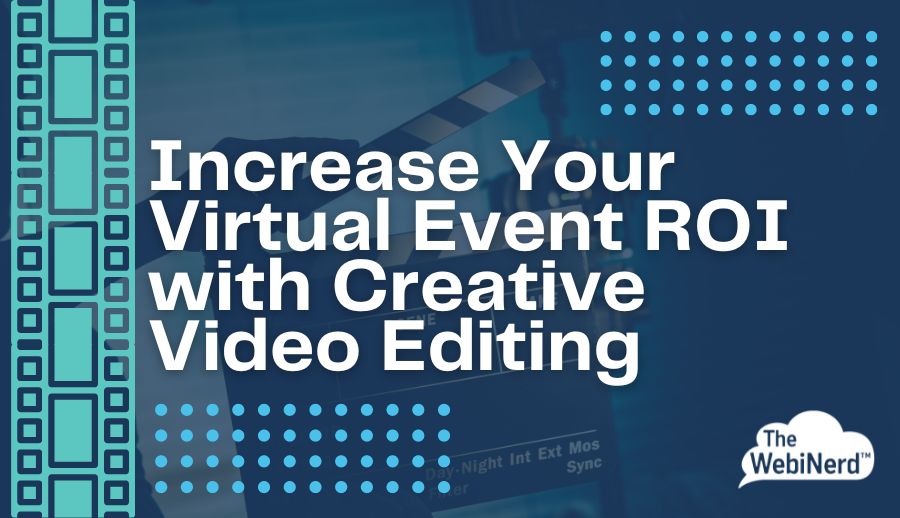
Increase Your Virtual Event ROI with Creative Video Editing
Simply recording your virtual event or meeting is easy if you’re using one of the major conferencing platforms. Just click and let it run until the meeting ends. But how do you take that full-length webinar recording and turn it into something that will help drive more views and build on your initial investment?
Turning an event recording into usable content for your marketing and social media takes a bit of video editing and some advance planning. In this article we’ll walk you through things to consider when you’re planning a virtual event to be sure the recording you capture will continue to generate engagement long after you hit End Webinar.
Clean up your recording before sharing out links.
The beauty of video editing is that you can erase bits that won’t be impactful for your future viewers. Yes, it would be faster to send out the replay link as soon as the webinar is over and let your viewers wade through the entire event. However, if you take the time to make the content more concise it will help you respect your viewer’s time, keep them watching to the end, and make your content look like it was built for evergreen use and not just a way to watch something a viewer missed.
- Cut out housekeeping remarks and information on how to interact with the webinar.
- Remove filler words (um, err, next slide) if it can be done smoothly.
- Consider speeding up speakers by 5-10% to shave off time – it usually isn’t very noticeable and can cut minutes off an hour long recording.
- If you ran into any tech issues during the live event this is your chance to clip out those sections and pretend like it never happened.
- Did you have a break built into your live event? Your post-event future audience won’t need to see that placeholder so make sure to cut it out if you didn’t pause the recording in the moment.
Using a product like Descript is doable for someone at the beginner level if you have the patience and time to do some learning. If you don’t have time or the desire to dive into video editing yourself, The WebiNerd offers flat rate video editing for Zoom recordings.
Switch camera views to make the recording more dynamic.
Zoom makes it easy to get the look of a multi-camera event by giving the option to save in all views. Yes, it takes up more room in your cloud storage, but having 5+ options that all line up give you the ability to alternate slides with the speakers, switch between gallery and speaker, and layer in other graphics with your audio.

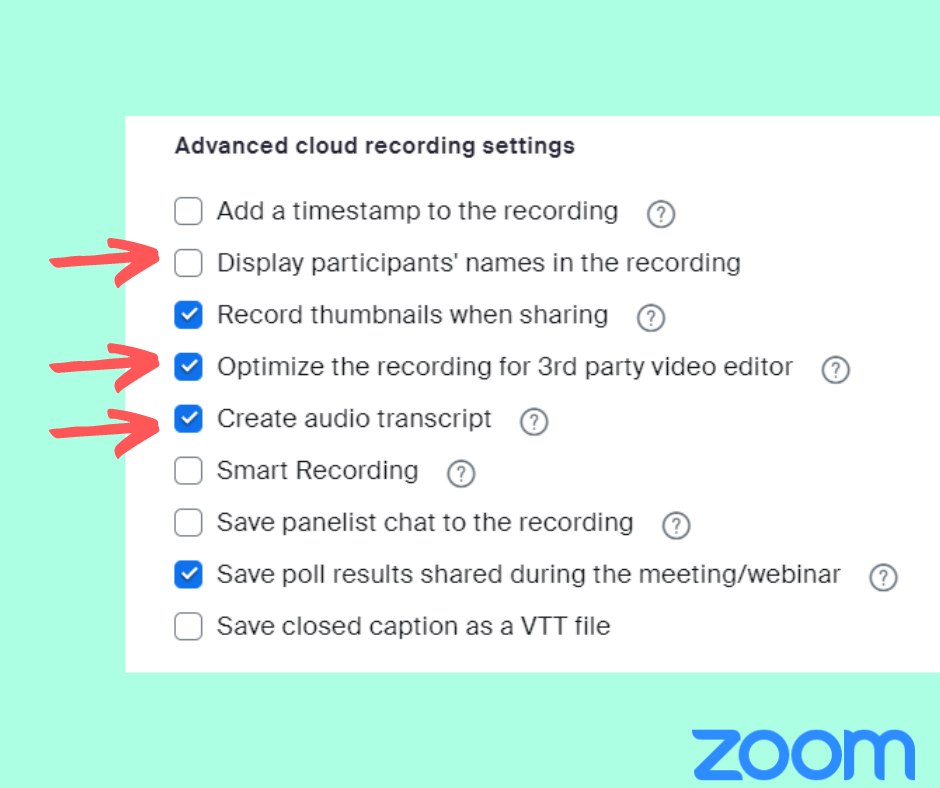
When we do recordings in Zoom we opt to not capture names because we like to layer in designed lower thirds. This is an advanced editing move, but not too complicated. Most video editing programs have pre-built lower thirds with animation that you can customize, or you can create your own in Canva. Customizing your lower thirds or name tags elevates your recording and gives you space to include titles, organizations and pronouns.
While we’re in Zoom, don’t forget to enable “Optimize for 3rd part video editor“. Enabling this will increase the file size, but is recommended to ensure compatibility when you bring in Zoom recording files for editing.
Using audio transcripts are a whole other blog post, but since we’re in the Zoom settings we’re also going to enable this feature to make your life easier down the road. Zoom transcripts will give you the option to search for words in your recording, which can come in handy if you’re clipping short segments for social media.
Turn your dynamic webinars into audio-only podcasts.
You don’t need to be a true crime sleuth to have a podcast and following. You can reach a larger audience by catering to users who consume content in the form of podcasts while they commute, work out at the gym, and fold the laundry. The work is all in the tech set up of your live webinar and recording. The microphones and audio capture of your speakers needs to be high quality during the recording so the podcast output is easy to listen to and doesn’t force listeners to exert energy. How do you capture high quality audio? Run a tech check in advance and make sure your speakers are using headphones or external microphones rather than their built-in laptop microphones. Background noise needs to be a minimum so an external mic with noise cancellation will help as well as making sure your webinar software ducks out noises.
Now that you have your audio, it’s time to turn it into a podcast. Don’t worry if your speakers refer to visuals that were on screen during the live event. You can load documents and links in your show notes so listeners can access them to follow along or access after they listen. Hello Audio is one tool we’ve been using at The WebiNerd and find it to be very user-friendly for beginner podcasters.
Want to edit your event recordings and grow your audience? Book a quick call to review your needs and we’ll get you pricing on the spot.
Related Posts